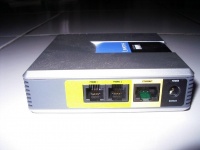
VoIP Cookbook: Linksys PAP-2 Analog Telephone Adapter
The simplest type of VoIP hardware is the Analog Telephone Adapter (ATA), which can easily be connected to a conventional telephone. The ATA used as an example in this book is the Linksys PAP2, which has two RJ-11 ports (FXS ports) that can be connected to two conventional phones. Each of these ports can be registered to a SIP Proxy server individually. As a result, we could have two SIP accounts, each connected to a conventional phone.
What we have to understand is that an ATA has two type of RJ11 connections, namely,
- FXO to be connected to PSTN / Telco line / PABX extension.
- FXS to be connected to Telephone line / FAX.
After all UTP, LAN, power and telephone cables are plugged in, you have to first of all find out the IP address of the Linksys PAP2 so we will be able to configure using the web, by carrying out the following steps:
- Press “*” repeatedly on the phone keypad until you hear someone talking through your phone.
- Press “110#” to listen to the IP address for the Linksys PAP2 configuration.
The next step is to configure your PC so that you can configure Linksys PAP2 through the web. All you have to do is match the family IP address to PAP2's, by doing the following: Go to Start, Open Control Panel, Network connections, local Area Connection, Internet Protocol (TCP/IP) and Properties. Then go to Web Linksys PAP2 from your PC through this address http://ip-address-pap2/.
