VoIP Cookbook: X-lite Configuration
Although X-Lite could run the moment you completed the installation process, it does not mean you can use it immediately. You still have to configure the softphone. Its configuration menu can be opened by right-clicking on X-lite. X-Lite 3.0 has two lines that can be operated simultaneously. This implies we can establish two concurrent calls, each to different destination.
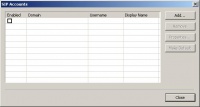
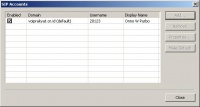
In X-Lite 3.0 configuration, you can enter the SIP account(s) given by your provider. However, the free software version of X-Lite 3.0 seems to limit the number of SIP accounts only one account. The previous version, X-Lite 2.0, allows 10 SIP accounts to be stored and used. Click “Add” to enter the information of the SIP account you have just created in VoIP Rakyat or of any other SIP accounts.
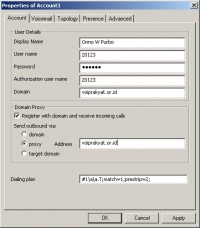
In the account tab, you have to fill in your username, authorization user name, which is the phone number given by the provider, the password obtained from VoIP Rakyat or any other SIP providers; the proxy address, which is voiprakyat.or.id, the address of VoIP Rakyat. Other information you also have to fill are domain, which is voiprakyat.or.id, and Display name, any name you want to enter. This functions as a Caller ID in a telecom network.
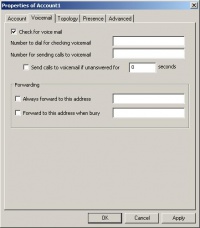
In the Voicemail tab, we can determine to where we have to dial in order to listen to our Voicemail. For VoIP Rakyat, the number is 904. Enter this number into "Number to dial for checking voicemail". If you use othr provider, use the number provided by the provider instead.
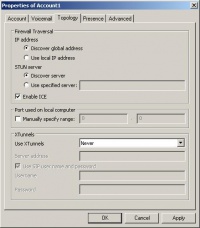
In the Topology tab, you can activate X-lite's ability to penetrate Firewall/NAT, to identify the public IP address that is used and so on. You can also use the default settings that will automatically know the public IP address that we use. However, NAT may still be problematic, as not all configuration can be traversed by signaling protocol and media used a SIP provider.
For Presence and Advanced tabs, use the default values. Some parameters you can change are the time intervals used to periodically register our account to the SIP server. This ensures that the SIP account remains registered. After all configurations are completed, click “Ok” to activate the configurations.
Once everything is properly configured, the SIP account you have just configured will become available. Tick the box under the column “Enabled” to activate the account. Then click “Close” to close the SIP account menu.
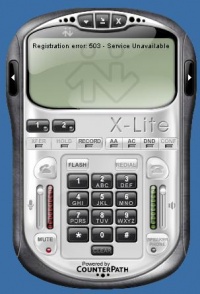
With the configuration completed, you can now start using X-Lite. If the registration process is successful, you will get a message stating “Log in” on the softphone screen or otherwise the message states “Registration Error” and you have to check whether you have properly configured the softphone.
To place a call, click on the numbers already available or click the numbers on the keypad.
