VoIP Cookbook: Configuring VoIP on Linksys SPA9000
Basically, there are several types of telephone connection in available in Linksys SPA9000:
- Two FXS or connections to the telephone. This connection basically needs not to be configured and by default, its number is 100 and 101.
- Four SIP connections to higher central level, to any SIP server
- There are 14 non-FXS extensions in form allocation for IP Phone. The number allocated ranges from 102 to 116. Still, configuration is not needed and, any IP Phone attempting to connect to Linksys SPA9000 can do so with a blank password.
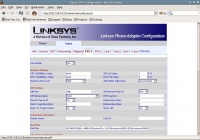
On the voice menu and admin menu, we can see the configuration for FX1 and FX2, or Line 1-4. On the FXS1 menu, we need to set Line Enable to Yes, so the FX1 will be able to receive calls dialed to it. Make sure that there is a phone line or fax machine connected to FXS1 or otherwise any incoming calls will not be received. Apply the same configuration to FXS2. Overall, the configuration allows us to connect two conventional phones, including fax machine, to Linksys SPA9000.
On the menu of Line 1 to Line 4, we can configure to which SIP server each of these lines will be registered to. Make sure Line Enable is set to Yes.
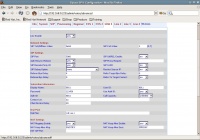
On Linksys SPA 9000 we could set four SIP accounts to be registered to any SIP Proxy, each account connected only to a line. Some important things to do this are as the following:
- set Line Enable to yes
- Fill the information pertaining to your account in the following parameters:
	Proxy		voiprakyat.or.id
	User ID	the number given by voiprakyat
	Password	password of voiprakyat account
	Use Auth ID	no
If you set “Use Auth ID” to ye, then fill that parameter with the number of your VoIP Rakyat account.
Do the same to your other SIP account(s) for the rest of the lines (Line2, Line 3 and Line 4).

