VoIP Cookbook: Briker's Console
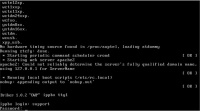
After installing the software, we can begin configuring through the console, by changing the IP address, date etc. All commands for the login console can be carried out only after you authenticate yourself as a root user. The commands for configuration through the console will not work unless you enter the following entries:
$ sudo su -
The password you have to enter is the one similar to that of user support (default password). For security reason, you should change the default password by doing the following:
# passwd
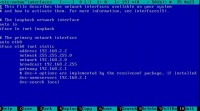
The default IP address of the Briker is 192.168.2.2. Change this address so that Briker will be able to adjust any network topology and obtain IP address allocation, by first of all editing file /etc/network/interfaces:
# vi /etc/network/interfaces
The above figure shows that the IP address is 192.168.2.2. Make necessary changes and save the configuration by pressing F2 and exit the editing platform by pressing F10.
Then restart the networking services to activate the configuration, by executing the following syntax:
# /etc/init.d/networking restart
Next we have to make sure that the date and time of the Briker are set properly. Check them by typing the following syntax:
# date
If they are not set properly, then adjust them. For example, if we want to set the time to 08.00 and date to July 1, 2008, then the syntax would be:
# date -s "2008-07-01 08:00:00"
Setting the date and time properly is particularly important if you are using Briker for commercial use.

