Difference between revisions of "WiFi: Linksys RE1000 Wireless Extender"
Onnowpurbo (talk | contribs) |
Onnowpurbo (talk | contribs) |
||
| Line 3: | Line 3: | ||
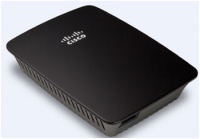
[[Image:Linksys-re1000-range-expand.jpg|center|200px|thumb|linksys re1000 range expander]] | [[Image:Linksys-re1000-range-expand.jpg|center|200px|thumb|linksys re1000 range expander]] | ||
| − | Linksys RE1000 wireless-N range extender | + | Linksys RE1000 wireless-N range extender dapat di set melalui cara |
| + | * secara manual melalui halaman web konfigurasi-nya. | ||
| + | * menggunakan software Cisco Connect | ||
| + | * menggunakan setup CD dari RE1000 | ||
| + | * menggunakan setup WiFi protected Setup jika router juga mendukung fitur WPS. | ||
| + | |||
==Cara mengakses RE1000== | ==Cara mengakses RE1000== | ||
Default IP Address dari Expander adalah 192.168.1.1 yang dapat diakses menggunakan dua (2) cara, yaitu, | Default IP Address dari Expander adalah 192.168.1.1 yang dapat diakses menggunakan dua (2) cara, yaitu, | ||
| − | |||
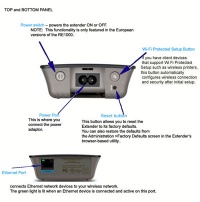
1. Using an Ethernet Cord, connect the expander directly to your computer. This type of connection is highly recommended for a more stable connectivity to the RE1000. | 1. Using an Ethernet Cord, connect the expander directly to your computer. This type of connection is highly recommended for a more stable connectivity to the RE1000. | ||
Revision as of 05:26, 20 February 2012
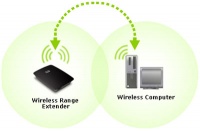
Linksys RE1000 Wireless-N Extender memungkinkan kita untuk merelay sinyal dari Access Point atau Router untuk memberikan sinyal ke wilayah yang sinyal-nya kecil. Secara sederhana Linksys RE1000 adalah perpanjangan tangan dari Router / Access Point sehingga kita dapat menambahkan client tambahan.
Linksys RE1000 wireless-N range extender dapat di set melalui cara
- secara manual melalui halaman web konfigurasi-nya.
- menggunakan software Cisco Connect
- menggunakan setup CD dari RE1000
- menggunakan setup WiFi protected Setup jika router juga mendukung fitur WPS.
Cara mengakses RE1000
Default IP Address dari Expander adalah 192.168.1.1 yang dapat diakses menggunakan dua (2) cara, yaitu,
1. Using an Ethernet Cord, connect the expander directly to your computer. This type of connection is highly recommended for a more stable connectivity to the RE1000.
1.a. Open a browser and access 192.168.1.1 (no username and password is admin). 1.b. Go to the Basic Wireless settings tab to configure your SSID and Security.
NOTE: The SSID and network key or password is case sensitive. If your range expander’s Channel settings do not match with the router’s Channel, the range expander may not work. The SSIS should also be with the same with the router. 1.c. Save the settings
2. Direct Wireless Connection Using your computer’s wireless capability, look for the default Network Name (SSID). Connecting to the range extender’s default Network Name (SSID) will enable your computer to communicate with the extender wirelessly.
NOTE: The default SSID of your Linksys range extender is LinksysExtenderXXXXX. Where XXXXX is the last five digits of its serial number.
Do the same steps in accessing the RE1000’s setup page ones you have successfully connected to LinksysExtenderXXXXX.
Referensi
- http://seoroot.com/blog/linksys-wireless-extenders/how-to-configure-linksys-re1000-range-expander-manually.html
- http://www6.nohold.net/Cisco2/ukp.aspx?pid=80&app=vw&vw=1&login=1&json=1&docid=f4c421dfe66c4883a0353dbf51494599_5617.xml
- http://www6.nohold.net/Cisco2/ukp.aspx?pid=80&app=vw&vw=1&login=1&json=1&docid=bc79b0ee350f404d82f231d729bc9530_Manually_Configuring_the_Wireless_Security_Settings_on_the_L.xml
Pranala Menarik
- WiFi: Client Wireless
- WiFi: CPE buatan pabrik indoor
- Penggunaan USB WiFi sebagai CPE - ide di tahun 2003-an
- WiFi: Peralatan USB Wifi untuk Antenna Wajanbolic e-goen
- Mengkonfigurasi Client WiFi
- WiFi: Setting usb wifi tplink tl-wn422g/322g di Ubuntu 9.10 / Kubuntu 9.10
- WiFi: Linksys RE1000 Wireless Extender


