Difference between revisions of "Ubuntu OwnCloud"
Onnowpurbo (talk | contribs) |
Onnowpurbo (talk | contribs) |
||
| Line 55: | Line 55: | ||
==Cara Lain== | ==Cara Lain== | ||
| − | |||
| − | |||
| − | |||
| − | + | ===Instalasi Web Server=== | |
| − | |||
| − | + | sudo apt-get install apache2 php5 php5-xmlrpc php5-mysql php5-gd php5-cli php5-curl \ | |
| + | mysql-client mysql-server libphp-adodb libgd2-xpm libgd2-xpm-dev \ | ||
| + | php5-curl php-pear php5-json php5-gd php5-sqlite curl libcurl3 \ | ||
| + | libcurl3-dev php5-curl php5-common php-xml-parser | ||
| − | + | ===Instalasi Owncloud Server=== | |
| − | + | ||
| − | |||
| − | |||
| − | |||
| − | |||
| − | |||
| − | |||
| − | |||
| − | |||
| − | |||
| − | |||
apt-get update | apt-get update | ||
apt-get install owncloud | apt-get install owncloud | ||
| − | |||
| − | |||
| − | |||
| − | |||
| − | |||
| − | |||
| − | |||
| − | |||
| − | |||
| − | |||
| − | |||
| − | |||
| − | |||
| − | |||
| − | |||
| − | |||
| − | |||
| − | |||
| − | |||
| − | |||
| − | |||
| − | |||
| − | |||
| − | + | Maka bisa di akses pada | |
| − | + | http://localhost/owncloud | |
| − | |||
| − | |||
| − | |||
| − | + | Folder berada di | |
| + | /usr/share/owncloud/ | ||
Revision as of 09:19, 23 February 2014
Sumber: http://jagoancengeng.wordpress.com/2013/03/18/membangun-drive-cloud-pada-jaringan-lokal/
eknologi Cloud saat ini sedang berkembang seiring dengan kebutuhan akan penyimpanan data yang bersifat “bisa di akses dimana saja”, beberapa perusahaan besar sudah mengintegrasikan layanan cloud dengan layanan yang lainnya sebut saja IBM dengan LotusLive ,Microsoft dengan Windows Azure, Apple dengan Mobile Me dan Google dengan google docs.
banyak nilai lebih untuk penyimpanan berbasis cloud, selain penyimpanan terpusat, data dapat di share bersama dengan pengguna lain dan dapat di akses dalam waktu bersamaan. Lantas bagaimana Solusi untuk Pemakai opensource yang ingin membentuk layanan penyimpanan Cloud jika ingin di terapkan dalam lingkungan jaringan lokal, semisal Perkantoran, Sekolah, Kampus ataupun instansi Pemerintah.
Tulisan ini akan coba untuk mengupas layanan owncloud, Applikasi cloud yang berjalan pada system Linux, untuk percobaan yang saya lakukan di mini lab rumah saya, saya menggunakan ubuntu 12.04 dan berikut kebutuhan untuk instalasi owncloud
Untuk menginstall own cloud jalankan step-step berikut.
1. lakukan update ubuntu dengan perintah
apt-get update
2.Install depedency yang di perlukan.
apt-get install apache2 php5 php5-json php5-gd php5-sqlite curl libcurl3 \
libcurl3-dev php5-curl php5-common php-xml-parser
3.Download script php setup-owncloud.php , kemudian letakkan pada folder
/var/www
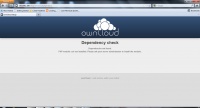
4.Akses dengan menggunakan browser http://192.168.1.108/setup-owncloud.php makan akan muncul tampilan seperti ini
[[Image:Install-cloud.jpg}center|200px|thumb]]
5.jangan panik dengan tampilan di Dibawah ini, karena modul instalasi belum mengidentifikasi depedency nya. untuk mengatasi hal tersbut lakukan Restart Apache dan beri permision read.write and exec untuk folder /var/www
/etc/init.d/apache2 restart
chmod 777 /var/www
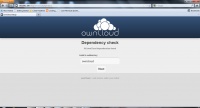
6. Setelah apache di restart dan nilai chmod untuk directory /var/www sudah di rubah, refresh Browsernya. maka tampilan akan seperti ini. beri nama subdirectory cloud bebas, boleh menggunakan apa saja.
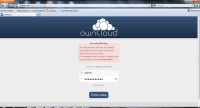
7.Berikan password untuk user admin, bebas mau kasih apa saja. dalam percobaan ini saya menggunakan password untuk admin, pass:imamgantengsekali (aihhh…narsis amat ) :)
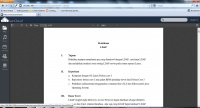
8. Setelah memasukan password untuk admin, maka instalasi sudah sukses.dan kita sudah bisa upload, share, download.
Alhamdulillah..sampai sini kita sudah mempunyai tempat penyimpanan berbasis cloud, Selamat bekreasi dengan owncloud, dan semoga bermanfaat.
Cara Lain
Instalasi Web Server
sudo apt-get install apache2 php5 php5-xmlrpc php5-mysql php5-gd php5-cli php5-curl \
mysql-client mysql-server libphp-adodb libgd2-xpm libgd2-xpm-dev \
php5-curl php-pear php5-json php5-gd php5-sqlite curl libcurl3 \
libcurl3-dev php5-curl php5-common php-xml-parser
Instalasi Owncloud Server
apt-get update
apt-get install owncloud
Maka bisa di akses pada
http://localhost/owncloud
Folder berada di
/usr/share/owncloud/


