VoIP Cookbook: Briker's Setup Recordings
Make a record for IVR that you will use (you can use the MS. Recorder application). For example, you can record “Welcome to PT Jelajah Media Information, press 1 for operator,” and set the encode to 16 bit, 8,000 Hz, and save it using the .wav extension (i.e. Welcome-jmi.wav). Upload the .wav file you have just created to the menu: IPPBX Administration > System Recordings, upload and name the file, for example, welcome-jmi, and save it. IVR Setup
In IPPBX Administration menu, choose IVR. Then choose Add IVR.
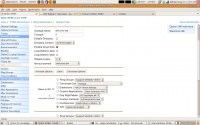
Fill the parameters with the following data:
Change Name : Welcome-JMI
Timeout : 10
Enable Directory : no/unchecked
Directory Context: default/empty
Enable Direct Dial : yes/check
Announcement : Welcome-JMI (recording)
Options available in the Figure 7.30 imply that a user who call the IVR could press 1 and be forwarded to Option-JMI-English, provided that the IVR Option-JMI-English is activated. Once the data and options are configured, click Save and choose Apply configuration changes.
