WiFi: HotSpot - Linksys WRT160NL Debrick
Sumber: http://wiki.openwrt.org/toh/linksys/wrt160nl
Linksys by Cisco WRT160NL
Atheros AP81 reference design with USB & 802.11 b/g/n WiFi. Supported versions Version/Model S/N OpenWrt Version Supported Model Specific Notes v1 CUR01 Kamikaze trunk r17250 & later WORK IN PROGRESS Hardware Highlights CPU Ram Flash Network USB Serial JTag Atheros 32MB 8MB 4x10/100 Yes Yes Yes Known issues
Some routers have U-boot 1.1.6 pre-installed which causes problems for OpenWrt. If you're owner of such device, read forum thread first. Some people were able to install OpenWrt by downgrading U-boot to 1.1.5 version. Installation
WORK IN PROGRESS DO NOT FLASH IF YOU LACK SERIAL CONSOLE Using ready build
You can download 10.03 build called openwrt-ar71xx-wrt160nl-squashfs.bin. After using it you will have to install kmod-ath9k to get WiFi working. Building OpenWrt yourself
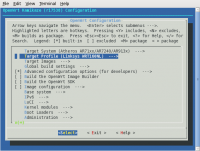
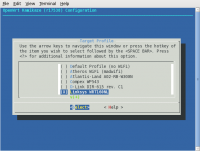
People who want more up-to-date OpenWrt may build a copy of trunk with the WRT160NL profile selected.
OEM easy installation
Can be flashed from Linksys web interface with file openwrt-ar71xx-wrt160nl-squashfs.bin OEM TFTP install
Set a PC on same network to some address in IP range 192.168.1.[2-254]. Download either Linksys or OpenWrt firmware image, store as code.bin. From serial console abort the U-boot process. Enter this on u-boot command line
ar7100> upgrade code.bin check link duplex:Full/speed:100 dup 1 speed 100 Tftpd start listening on port[69]! Load address: 0×80060000
Send file from windows PC with TFTP:
C:\tmp> tftp -i 192.168.1.1 put code.bin
For linux TFTP
$ tftp 192.168.1.1 69
tftp> mode binary tftp> put openwrt-ar71xx-wrt160nl-squashfs.bin
You should see this on console wait for flash to finish:
Receiving firmware [code.bin] from [192.168.1.10] Write File : CODE.BIN
Once U-boot command prompt returns enter
ar7100 > go
Upgrading OpenWrt
Pick one:
  1. Flash using LuCI
  2.sysupgrade -n openwrt-ar71xx-wrt160nl-squashfs.bin, as sysupgrade was added in Kamikaze trunk changeset 17202.
  3. mtd write openwrt-ar71xx-wrt160nl-squashfs.bin
Support history
Preliminary support added in trunk changeset 16068. Switch code added in Kamikaze trunk changeset 17057. Sysupgrade feature added since trunk changeset 17202, enabling a firmware upgrade alternative. Various fixes & addition of profile resolved major issues by changeset 17249 and 17250. Hardware Info
Architecture: Atheros AP81
Vendor: CyberTan
Bootloader: U-boot 1.1.5
CPU: Atheros 9130-BC1E 400 Mhz
Flash-Chip: cFeon EN25P64 8 MiB
RAM: Samsung K4H561638J-LCCC 32 MiB
Wireless: Atheros 9102 802.11 b/g/n (integrated)
antenna: 2 removable external RP-SMA dipoles
Ethernet: RTL8306SD
USB: Yes 1x 2.0
Serial: Yes
JTAG: Yes
Photos
Model Number
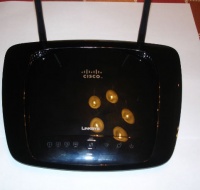
Front:
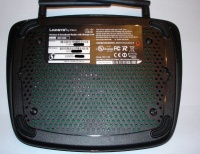
Back:
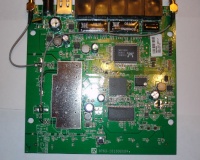
Circuit Board - Front:
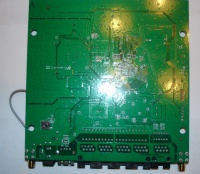
Circuit Board - Back:
Opening the case
Note: This will void your warranty!
- To remove the cover simply unscrew and remove the antennas, remove the 4 phillips-type screws on the bottom, and pry the case apart.
- There are no screws holding the PCB to the bottom cover once open.
Serial
Typical 3.3 volt TTL serial console present in 3 locations. The parameters are 115200 8-N-1
Location J3 on PCB with pin-header installed:
pin 	function
1 	3.3V
2  	TX
3 	RX
4 	NC
5 	GND
Initial successful efforts used a short Nokia DKU-5/CA-42 cable, these Atheros platforms seem to be difficult to work with using FTDI long cables.See more details here. EDIT - If you don't want to short your cable, use an old lynksys non-switching power adapter with transformer (switching adapters are generating noise which breaking serial console comunication)
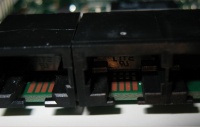
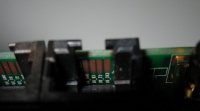
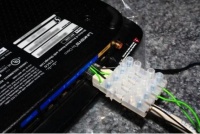
There are duplicate serial console contact points inside WAN & LAN4 ports on PCB edge. You can modify an RJ45 plug with wires in the appropriate spots to access serial console without cracking open the case. Here is an example crafted by users retracile and EraZor:
JTAG
There is a micro-JTAG connector present but so far no one has identified the header-size or attempted to access it.
GPIO
pin 	function
6 	LED_WLAN
7 	BTN_WPS
8 	LED_WPS_BLUE
9 	LED_WPS_AMBER
14	LED_POWER
21	BTN_RESET
Specific configuration Interfaces
The default network configuration is:
Interface Name 	Description             Default configuration
br-lan                 LAN & WiFi              192.168.1.1/24
eth0                   LAN ports (1 to 4)      None
eth1                   WAN port                DHCP
wlan0                  WiFi                    Disabled
Switch Ports (for VLANs)
External Label 	Port
1 	3
2 	2
3 	1
4 	0
Failsafe mode
If you forgot your password, broken one of the startup scripts, firewalled yourself or corrupted the JFFS2 partition, you can get back in by using OpenWrt's failsafe mode. Boot into failsafe mode
- Unplug the router's power cord.
- Connect the router's LAN1 port directly to your PC.
- Configure your PC with a static IP address between 192.168.1.2 and 192.168.1.254. E. g. 192.168.1.2 (gateway and DNS is not required).
- Plug the power on and wait for the DMZ LED to light up.
- While the DMZ LED is on immediately press any button (Reset and Secure Easy Setup will work) a few times .
- If done right the DMZ LED will quickly flash 3 times every second.
- You should be able to telnet to the router at 192.168.1.1 now (no username and password)
What to do in failsafe mode?
NOTE: The root file system in failsafe mode is the SquashFS partition mounted in readonly mode. To switch to the normal writable root file system run mount_root and make any changes. Run mount_root now.
1. Forgot/lost your password and you like to set a new one
passwd
2. Forgot the routers IP address
uci get network.lan.ipaddr
3. You accidentally run 'ipkg upgrade' or filled up the flash by installing to big packages (clean the JFFS2 partition and start over)
mtd -r erase rootfs_data
If you are done with failsafe mode power cycle the router and boot in normal mode. Buttons
There are 2 buttons. They are Reset and WiFi Protected Setup. The buttons can be used with hotplug events. E. g. [#wifitoggle WiFi toggle]. BUTTON Event Reset reset WiFi Protected Setup wps Hardware mods Antenna
The supplied short dipole antennas can be easily replaced with large omni or directional antenna. Other info
Original exploration thread https://forum.openwrt.org/viewtopic.php?id=20298&p=1
Referensi
http://wiki.openwrt.org/toh/linksys/wrt160nl
