Difference between revisions of "Orange: Random Forest"
Onnowpurbo (talk | contribs) (→Output) |
Onnowpurbo (talk | contribs) (→Contoh) |
||
| Line 30: | Line 30: | ||
==Contoh== | ==Contoh== | ||
| − | + | Untuk contoh classification task, kita menggunakan dataset iris. Menghubungkannya ke Widget Predictions. Kemudian, hubungkan Widget File ke Widget Random Forest dan Widget Tree dan hubungkan mereka ke Widget Predictions. Akhirnya, kita bisa memperhatikan prediksi dari ke dua model. | |
[[File:RandomForest-classification.png|center|200px|thumb]] | [[File:RandomForest-classification.png|center|200px|thumb]] | ||
| Line 37: | Line 37: | ||
[[File:RandomForest-regression.png|center|200px|thumb]] | [[File:RandomForest-regression.png|center|200px|thumb]] | ||
| − | |||
==Referensi== | ==Referensi== | ||
Revision as of 07:22, 3 March 2020
Sumber: https://docs.biolab.si//3/visual-programming/widgets/model/randomforest.html
Memprediksi menggunakan sebuah ensemble (kumpulan / koleksi) dari decision tree.
Input
Data: input dataset
Preprocessor: preprocessing method(s)
Output
Learner: random forest learning algorithm
Model: trained model
Random forest adalah sebuah ensemble learning method yang digunakan untuk classification, regression dan tugas-tugas lainnya. Random forest pertama kali di usulkan oleh Tin Kam Ho dan di kembangkan lebih lanjut oleh Leo Breiman (Breiman, 2001) dan Adele Cutler.
Random Forest membangun sekumpulan decision tree. Setiap tree di kembangkan dari sebuah bootstrap sample dari training data. Ketika mengembangkan individual tree, subset acak dari atribut diambil (maka digunakan istilah "Random"), dari mana atribut terbaik untuk split (pemisahan) dipilih. Model terakhir didasarkan pada suara terbanyak dari individually developed tree di forest.
Random Forest dapat digunakan untuk task (tugas) klasifikasi dan regresi.
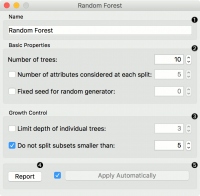
- Specify the name of the model. The default name is “Random Forest”.
- Specify how many decision trees will be included in the forest (Number of trees in the forest), and how many attributes will be arbitrarily drawn for consideration at each node. If the latter is not specified (option Number of attributes… left unchecked), this number is equal to the square root of the number of attributes in the data. You can also choose to fix the seed for tree generation (Fixed seed for random generator), which enables replicability of the results.
- Original Breiman’s proposal is to grow the trees without any pre-pruning, but since pre-pruning often works quite well and is faster, the user can set the depth to which the trees will be grown (Limit depth of individual trees). Another pre-pruning option is to select the smallest subset that can be split (Do not split subsets smaller than).
- Produce a report.
- Click Apply to communicate the changes to other widgets. Alternatively, tick the box on the left side of the Apply button and changes will be communicated automatically.
Contoh
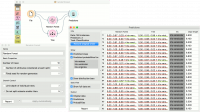
Untuk contoh classification task, kita menggunakan dataset iris. Menghubungkannya ke Widget Predictions. Kemudian, hubungkan Widget File ke Widget Random Forest dan Widget Tree dan hubungkan mereka ke Widget Predictions. Akhirnya, kita bisa memperhatikan prediksi dari ke dua model.
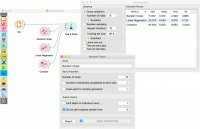
For regressions tasks, we will use housing data. Here, we will compare different models, namely Random Forest, Linear Regression and Constant, in the Test & Score widget.
Referensi
Breiman, L. (2001). Random Forests. In Machine Learning, 45(1), 5-32. Available here.


