Difference between revisions of "Backtrack: Install di Harddisk"
Jump to navigation
Jump to search
Onnowpurbo (talk | contribs) |
Onnowpurbo (talk | contribs) |
||
| (5 intermediate revisions by the same user not shown) | |||
| Line 1: | Line 1: | ||
| − | + | '''WARNING: Karena Backtrack 4.0 berbasis Ubuntu 8.10, dia akan merusak GRUB Ubuntu 9.10 ke atas :((''' | |
| − | + | Cara instalasi yang paling sederhana | |
| − | + | ||
| − | + | * Boot Backtrack dari mesin yang akan di install. | |
| + | * ketik "startx" agar KDE jalan | ||
| + | * Double klik pada "install.sh" di Desktop, atau jalankan "ubiquity" di konsol. | ||
| + | * Selanjutnya lalui langkah instalasi yang mirip dengan langkah instalasi Ubuntu, sebagai berikut | ||
| + | |||
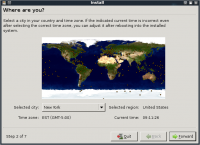
| + | * Pilih lokasi geografis | ||
[[Image:Bt4inst-01.png|center|200px|thumb]] | [[Image:Bt4inst-01.png|center|200px|thumb]] | ||
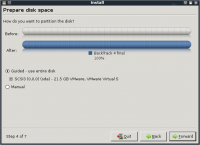
| − | + | * Konfigurasi Partisi jika di perlukan | |
| − | + | ||
| − | + | [[Image:Bt4inst-02.png|center|200px|thumb]] | |
| − | + | ||
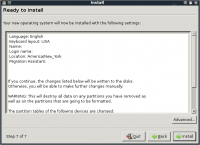
| + | * Install jika semua sudah sesuai dengan keinginan kita | ||
| + | |||
| + | [[Image:Bt4inst-03.png|center|200px|thumb]] | ||
| + | |||
| + | ==Beberapa Tips== | ||
| + | * Default username & password root / toor. | ||
| + | * Fix framebuffer splash dengan menulis “fix-splash” ( atau “fix-splash800″ jika anda menginginkan 800×600 framebuffer), reboot. | ||
==Referensi== | ==Referensi== | ||
| + | * http://www.backtrack-linux.org/tutorials/backtrack-hard-drive-install/ | ||
* http://www.backtrack-linux.org | * http://www.backtrack-linux.org | ||
* http://www.backtrack-linux.org/downloads/ | * http://www.backtrack-linux.org/downloads/ | ||
* http://www.backtrack-linux.org/tutorials/backtrack-forensics/ | * http://www.backtrack-linux.org/tutorials/backtrack-forensics/ | ||
* http://www.backtrack-linux.org/bt/wireless-drivers/ | * http://www.backtrack-linux.org/bt/wireless-drivers/ | ||
| + | * http://www.offensive-security.com/documentation/backtrack-hd-install.pdf | ||
==Pranala Menarik== | ==Pranala Menarik== | ||
Latest revision as of 20:48, 2 June 2010
WARNING: Karena Backtrack 4.0 berbasis Ubuntu 8.10, dia akan merusak GRUB Ubuntu 9.10 ke atas :((
Cara instalasi yang paling sederhana
- Boot Backtrack dari mesin yang akan di install.
- ketik "startx" agar KDE jalan
- Double klik pada "install.sh" di Desktop, atau jalankan "ubiquity" di konsol.
- Selanjutnya lalui langkah instalasi yang mirip dengan langkah instalasi Ubuntu, sebagai berikut
- Pilih lokasi geografis
- Konfigurasi Partisi jika di perlukan
- Install jika semua sudah sesuai dengan keinginan kita
Beberapa Tips
- Default username & password root / toor.
- Fix framebuffer splash dengan menulis “fix-splash” ( atau “fix-splash800″ jika anda menginginkan 800×600 framebuffer), reboot.
Referensi
- http://www.backtrack-linux.org/tutorials/backtrack-hard-drive-install/
- http://www.backtrack-linux.org
- http://www.backtrack-linux.org/downloads/
- http://www.backtrack-linux.org/tutorials/backtrack-forensics/
- http://www.backtrack-linux.org/bt/wireless-drivers/
- http://www.offensive-security.com/documentation/backtrack-hd-install.pdf


