Difference between revisions of "ProxMox: Membuat Cluster"
Onnowpurbo (talk | contribs) (New page: ==Introduction== Proxmox VE Cluster enables central management of multiple physical servers. A Proxmox VE Cluster consists of one master and several nodes (minimum is a master and one node...) |
Onnowpurbo (talk | contribs) |
||
| (8 intermediate revisions by the same user not shown) | |||
| Line 1: | Line 1: | ||
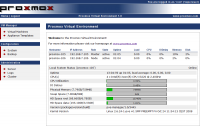
| − | + | [[Image:Screen-startpage-with-cluster.png|right|200px|thumb|Halaman Awal dengan 2 mesin]] | |
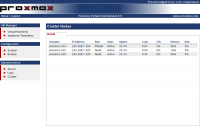
| − | + | [[Image:Screen-cluster-nodes.png|right|200px|thumb|Halaman Cluster dengan 3 mesin]] | |
| − | + | Proxmox VE Cluster memungkinkan untuk melakukan manajemen terpusat dari banyak server fisik. Sebuah Proxmox VE Cluster terdiri dari minimal satu master dan beberapa node (minimal satu master dan satu node). | |
| − | |||
| − | |||
| − | |||
| − | |||
| − | |||
| − | == | + | ===Fitur Utama=== |
| − | + | Fitur utama ProxMox VE Cluster adalah | |
| − | + | * Manajemen terpusat melalui web. | |
| + | * satu login dan password untuk mengakses semua node dan guest | ||
| + | * Console dapat melihat semua Virtual Machines | ||
| + | * Melakukan migrasi dari virtual machine antara berbagai mesin yang secara fisik berbeda. | ||
| + | * Sinkronisasi Virtual Appliance template store | ||
| − | + | ==Membuat Proxmox VE Cluster== | |
| + | Pertama-tama, instal dua Proxmox VE servers seperti biasa. Pastikan masing-masing Proxmox VE server mempunyai hostname yang unik, karena default-nya semua server akan mempunyai hostname yang sama. | ||
| + | |||
| + | Saat ini, pembuatan cluster hanya dapat dilakukan melalui consol, anda dapat login ke Proxmox VE server melalui ssh. | ||
| + | |||
| + | Semua konfigurasi dapat dilakukan melalui "pveca", PVE Cluster Administration Toolkit | ||
<pre> | <pre> | ||
| − | USAGE: pveca -l # | + | USAGE: pveca -l # memperlihatkan status cluster |
| − | pveca -c # | + | pveca -c # membuat cluster baru dengan localhost sebagai master |
| − | pveca -s [-h IP] # sync cluster | + | pveca -s [-h IP] # sync konfigurasi cluster dari master (atau IP) |
| − | pveca -d ID # delete | + | pveca -d ID # delete node |
| − | pveca -a [-h IP] # | + | pveca -a [-h IP] # tambahkan sebuah node baru ke cluster |
| − | pveca -m # | + | pveca -m # memaksa local node untuk menjadi master |
</pre> | </pre> | ||
| − | |||
| − | |||
| − | ''' | + | ===Mendefinisikan Master=== |
| + | Login melalui ssh ke Proxmox VE server pertama. | ||
| + | |||
| + | '''Membuat master:''' | ||
<pre>pveca -c</pre> | <pre>pveca -c</pre> | ||
| − | + | Check status cluster: | |
<pre>pveca -l</pre> | <pre>pveca -l</pre> | ||
| − | === | + | ===Tambahkan node ke master=== |
| − | Login | + | Login melalui ssh ke Proxmox VE server kedua. Perlu di catat, pada proses ini node harus tidak ada VM yang jalan. Jika ada VM yang jalan maka kemungkinan kita akan mendapatkan conflict VMID yang sama, untuk mengatasi hal ini gunakan vzdump untuk membackup dan untuk merestore berbagai VMID sesudah konfigurasi cluster. |
| − | ''' | + | '''Mengintegrasikan node ke master:''' |
<pre>pveca -a -h IP-ADDRESS-MASTER</pre> | <pre>pveca -a -h IP-ADDRESS-MASTER</pre> | ||
| − | + | Untuk mencek status cluster: | |
<pre>pveca -l</pre> | <pre>pveca -l</pre> | ||
| − | ''' | + | '''Tampilkan status dari cluster:''' |
<pre>pveca -l | <pre>pveca -l | ||
CID----IPADDRESS----ROLE-STATE--------UPTIME---LOAD----MEM---ROOT---DATA | CID----IPADDRESS----ROLE-STATE--------UPTIME---LOAD----MEM---ROOT---DATA | ||
| Line 48: | Line 53: | ||
3 : 192.168.7.105 N A 00:13 1.41 22% 3% 15% | 3 : 192.168.7.105 N A 00:13 1.41 22% 3% 15% | ||
4 : 192.168.7.106 N A 00:05 0.54 17% 3% 3%</pre> | 4 : 192.168.7.106 N A 00:05 0.54 17% 3% 3%</pre> | ||
| − | == | + | |
| − | + | ==Bekerja dengan Proxmox VE Cluster== | |
| + | Sekarang kita dapat mulai membuat Virtual Machine di node cluster dengan menggunakan [[Central Web-based Management]] di master. | ||
==Troubleshooting== | ==Troubleshooting== | ||
| − | + | Kita dapat secara manual men-cek file konfigurasi cluster di setiap node. Sebelum mengedit file ini, sebaiknya di hentikan layanan cluster sync & tunnel melalu interface web. | |
<pre>nano /etc/pve/cluster.cfg</pre> | <pre>nano /etc/pve/cluster.cfg</pre> | ||
| − | + | Juga cek apakah file berikut sudah terupdate, jika tidak sebaiknya dibuang aja file berikut agar diupdate secara automatis. | |
<pre>/root/.ssh/known_hosts</pre> | <pre>/root/.ssh/known_hosts</pre> | ||
| − | ===Delete | + | ===Delete dan membuat ulang konfigurasi cluster=== |
| − | + | Kadangkala lebih cepat men-delete dan membuat ulang konfigurasi cluster anda daripada berusaha untuk mencari yang salah. Proses yang perlu dilakukan seperti menghentikan layanan cluster sync & tunnel, men-delete konfigurasi cluster dan membuat cluster baru. Langkah-nya adalah sebagai berikut, | |
| − | * ''' | + | * '''Catatan:''' Jika ssh host key kita berubah maka kita perlu men-delete pada setiap host sebelum kita mulai: |
<pre> | <pre> | ||
rm /root/.ssh/known_hosts | rm /root/.ssh/known_hosts | ||
</pre> | </pre> | ||
| − | * | + | * Catat IP address dari master node yang baru. |
| − | * | + | * Jalankan master node yang baru: |
<pre> | <pre> | ||
/etc/init.d/pvemirror stop | /etc/init.d/pvemirror stop | ||
| Line 72: | Line 78: | ||
pveca -c | pveca -c | ||
</pre> | </pre> | ||
| − | * | + | * Verifikasi bahwa cluster sudah dibuat: |
<pre> | <pre> | ||
pveca -l | pveca -l | ||
</pre> | </pre> | ||
| − | * | + | * Jalankan node yang ingin kita integrasikan ke cluster yang baru. |
| − | ** '''Note:''' | + | ** '''Note:''' Ubah '''IP-ADDRESS-MASTER''' ke IP dari node master yang baru. |
<pre> | <pre> | ||
/etc/init.d/pvemirror stop | /etc/init.d/pvemirror stop | ||
| Line 84: | Line 90: | ||
pveca -a -h IP-ADDRESS-MASTER | pveca -a -h IP-ADDRESS-MASTER | ||
</pre> | </pre> | ||
| − | * | + | * Verifikasi bahwa node sudah di tambahkan di cluster yang baru: |
<pre> | <pre> | ||
pveca -l | pveca -l | ||
</pre> | </pre> | ||
| − | + | ||
| − | |||
==Tutorials== | ==Tutorials== | ||
* [http://c-nergy.be/blog/?p=393 Griffon's IT Library - ProxMox Cluster Walkthrough] | * [http://c-nergy.be/blog/?p=393 Griffon's IT Library - ProxMox Cluster Walkthrough] | ||
| − | |||
| − | |||
| − | |||
| − | |||
| − | |||
| − | |||
| − | |||
* http://pve.proxmox.com/wiki/Proxmox_VE_Cluster | * http://pve.proxmox.com/wiki/Proxmox_VE_Cluster | ||
==Pranala Menarik== | ==Pranala Menarik== | ||
| + | |||
| + | * [[Cloud]] | ||
| + | * [[Proxmox]] | ||
| + | * [[ProxMox: Instalasi melalui CDROM]] | ||
| + | * [[ProxMox: Instalasi di Mesin i686 - tidak bisa]] | ||
| + | * [[ProxMox: Akses Web Administrator]] | ||
| + | * [[ProxMox: Upload file iso installer]] | ||
| + | * [[ProxMox: Membuat Virtual Disk]] | ||
| + | * [[ProxMox: Instalasi Java Plugin untuk VNC Browser]] | ||
| + | * [[ProxMox: Mengaktifkan Mesin Virtual]] | ||
| + | * [[ProxMox: Akses Konsol VNC]] | ||
| + | * [[ProxMox: Membuat Cluster]] | ||
| + | * [[ProxMox: Backup - Restore - Live Migration]] | ||
Latest revision as of 10:53, 2 July 2011
Proxmox VE Cluster memungkinkan untuk melakukan manajemen terpusat dari banyak server fisik. Sebuah Proxmox VE Cluster terdiri dari minimal satu master dan beberapa node (minimal satu master dan satu node).
Fitur Utama
Fitur utama ProxMox VE Cluster adalah
- Manajemen terpusat melalui web.
- satu login dan password untuk mengakses semua node dan guest
- Console dapat melihat semua Virtual Machines
- Melakukan migrasi dari virtual machine antara berbagai mesin yang secara fisik berbeda.
- Sinkronisasi Virtual Appliance template store
Membuat Proxmox VE Cluster
Pertama-tama, instal dua Proxmox VE servers seperti biasa. Pastikan masing-masing Proxmox VE server mempunyai hostname yang unik, karena default-nya semua server akan mempunyai hostname yang sama.
Saat ini, pembuatan cluster hanya dapat dilakukan melalui consol, anda dapat login ke Proxmox VE server melalui ssh.
Semua konfigurasi dapat dilakukan melalui "pveca", PVE Cluster Administration Toolkit
USAGE: pveca -l             # memperlihatkan status cluster
       pveca -c             # membuat cluster baru dengan localhost sebagai master
       pveca -s [-h IP]     # sync konfigurasi cluster dari master (atau IP)
       pveca -d ID          # delete node
       pveca -a [-h IP]     # tambahkan sebuah node baru ke cluster
       pveca -m             # memaksa local node untuk menjadi master
Mendefinisikan Master
Login melalui ssh ke Proxmox VE server pertama.
Membuat master:
pveca -c
Check status cluster:
pveca -l
Tambahkan node ke master
Login melalui ssh ke Proxmox VE server kedua. Perlu di catat, pada proses ini node harus tidak ada VM yang jalan. Jika ada VM yang jalan maka kemungkinan kita akan mendapatkan conflict VMID yang sama, untuk mengatasi hal ini gunakan vzdump untuk membackup dan untuk merestore berbagai VMID sesudah konfigurasi cluster.
Mengintegrasikan node ke master:
pveca -a -h IP-ADDRESS-MASTER
Untuk mencek status cluster:
pveca -l
Tampilkan status dari cluster:
pveca -l
CID----IPADDRESS----ROLE-STATE--------UPTIME---LOAD----MEM---ROOT---DATA
 1 : 192.168.7.104   M     A    5 days 01:43   0.54    20%     1%     4%
 2 : 192.168.7.103   N     A    2 days 05:02   0.04    26%     5%    29%
 3 : 192.168.7.105   N     A           00:13   1.41    22%     3%    15%
 4 : 192.168.7.106   N     A           00:05   0.54    17%     3%     3%
Bekerja dengan Proxmox VE Cluster
Sekarang kita dapat mulai membuat Virtual Machine di node cluster dengan menggunakan Central Web-based Management di master.
Troubleshooting
Kita dapat secara manual men-cek file konfigurasi cluster di setiap node. Sebelum mengedit file ini, sebaiknya di hentikan layanan cluster sync & tunnel melalu interface web.
nano /etc/pve/cluster.cfg
Juga cek apakah file berikut sudah terupdate, jika tidak sebaiknya dibuang aja file berikut agar diupdate secara automatis.
/root/.ssh/known_hosts
Delete dan membuat ulang konfigurasi cluster
Kadangkala lebih cepat men-delete dan membuat ulang konfigurasi cluster anda daripada berusaha untuk mencari yang salah. Proses yang perlu dilakukan seperti menghentikan layanan cluster sync & tunnel, men-delete konfigurasi cluster dan membuat cluster baru. Langkah-nya adalah sebagai berikut,
- Catatan: Jika ssh host key kita berubah maka kita perlu men-delete pada setiap host sebelum kita mulai:
rm /root/.ssh/known_hosts
- Catat IP address dari master node yang baru.
- Jalankan master node yang baru:
/etc/init.d/pvemirror stop
/etc/init.d/pvetunnel stop
rm /etc/pve/cluster.cfg
pveca -c
- Verifikasi bahwa cluster sudah dibuat:
pveca -l
- Jalankan node yang ingin kita integrasikan ke cluster yang baru.
- Note: Ubah IP-ADDRESS-MASTER ke IP dari node master yang baru.
/etc/init.d/pvemirror stop
/etc/init.d/pvetunnel stop
rm /etc/pve/cluster.cfg
pveca -a -h IP-ADDRESS-MASTER
- Verifikasi bahwa node sudah di tambahkan di cluster yang baru:
pveca -l
Tutorials
Pranala Menarik
- Cloud
- Proxmox
- ProxMox: Instalasi melalui CDROM
- ProxMox: Instalasi di Mesin i686 - tidak bisa
- ProxMox: Akses Web Administrator
- ProxMox: Upload file iso installer
- ProxMox: Membuat Virtual Disk
- ProxMox: Instalasi Java Plugin untuk VNC Browser
- ProxMox: Mengaktifkan Mesin Virtual
- ProxMox: Akses Konsol VNC
- ProxMox: Membuat Cluster
- ProxMox: Backup - Restore - Live Migration

