Difference between revisions of "VoIP Cookbook: Installing X-Lite"
Onnowpurbo (talk | contribs) (New page: center|200px|thumb|X-Lite Welcoming Installation Window Once x-lite installer program is run, we will be directed to a Welcoming Dialog Properties. Clic...) |
Onnowpurbo (talk | contribs) |
||
| (One intermediate revision by the same user not shown) | |||
| Line 14: | Line 14: | ||
For quicker and easier way of using x-lite, you can add x-lite as a desktop icon or even set it to activate when Windows starts (See Figure). Click “Next” to proceed. | For quicker and easier way of using x-lite, you can add x-lite as a desktop icon or even set it to activate when Windows starts (See Figure). Click “Next” to proceed. | ||
| + | |||
| + | [[Image:X-lite-win-install-5.jpg|center|200px|thumb|The dialog Windows indicating that installation is in progress]] | ||
| + | |||
| + | X-lite then extracts all files required for the program (See Figure). | ||
| + | |||
| + | [[Image:X-lite-win-install-6.jpg|center|200px|thumb|The Windows showing that the installation process is completed]] | ||
| + | |||
| + | Once the installation process is completed, you can directly run X-Lite by checking the Launch X-Lite box and clicking Finish button. | ||
| + | |||
==See Also== | ==See Also== | ||
| Line 19: | Line 28: | ||
* [[VoIP Cookbook: Building your own Telecommunication Infrastructure]] | * [[VoIP Cookbook: Building your own Telecommunication Infrastructure]] | ||
* [[VoIP Cookbook: Becoming a user]] | * [[VoIP Cookbook: Becoming a user]] | ||
| + | |||
| + | [[Category: VoIP]] | ||
Latest revision as of 09:57, 13 May 2010
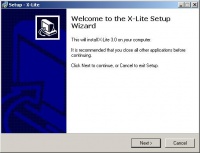
Once x-lite installer program is run, we will be directed to a Welcoming Dialog Properties. Click on “Next” to proceed to the next step of the installation process.
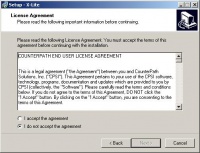
What appears next is the licensing agreement between x-lite creator and you being the user. This ensures that x-lite will not be liable for the poor VoIP voice quality produced by x-lite. Just like earlier, click on the “I accept the agreement” button and click Next.
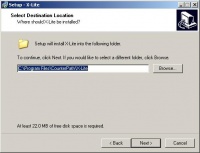
Next X-lite will ask where the program will be installed. The default folder is C:\ProgramFiles\CounterPath\X-Lite, as shown in the Figure. You can change the folder if you want. Whichever folder you choose, click Next to continue the installation process.
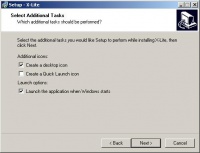
For quicker and easier way of using x-lite, you can add x-lite as a desktop icon or even set it to activate when Windows starts (See Figure). Click “Next” to proceed.
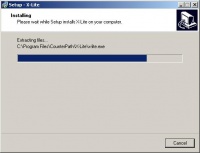
X-lite then extracts all files required for the program (See Figure).
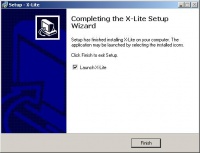
Once the installation process is completed, you can directly run X-Lite by checking the Launch X-Lite box and clicking Finish button.
