Difference between revisions of "VoIP Cookbook: Briker's Web IP PBX Configuration"
Onnowpurbo (talk | contribs) (New page: To do IP PBX configuration, choose IP PBX Administration from the main menu, as shown in The Figure. [[Image:Briker-ippbx-admin-01.jpeg|center|200px|thumb|Menu to configure IPPBX features...) |
Onnowpurbo (talk | contribs) |
||
| Line 17: | Line 17: | ||
[[Image:Briker-ippbx-admin-03.jpeg|center|200px|thumb|Dialog Properties of Adding SIP Extension]] | [[Image:Briker-ippbx-admin-03.jpeg|center|200px|thumb|Dialog Properties of Adding SIP Extension]] | ||
| − | + | Fill in user extension with extension number, e.g. 1001. This is usually just numeric. Then fill in the display name, the name that will be used as Caller ID when dialing. Fill in secret with the password used by user for authentication process in registration extension at User Agent layer. Click Submit. | |
==See Also== | ==See Also== | ||
Latest revision as of 10:56, 9 March 2010
To do IP PBX configuration, choose IP PBX Administration from the main menu, as shown in The Figure.
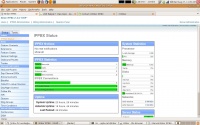
IP PBX status indicates System Statistics showing the percentage of Load Average, CPU, Memory and Swap being used, the usage of harddisk space and the speed of Receive and Transmit Ethernet. Also availabe in this display is IPPBX Statistics showing Total Active Calls, Internal Calls, External Calls, Total Active Channels, and Uptime Briker. These data are realtime, updated periodically and automatically, a process that consumes a considerable amount of CPU resources. So it is recommended that you do not keep accessing this main page.
Extensions
When you are familiar with the main display, it is time for you to add Extension, user who will use Briker services. Click Extension on IP PBX Administration menu. Through this option, you will be able to add new account, omit or replace any existing one.
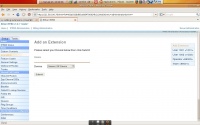
Click Add Extensions. Then choose the sort of protocols used by the account: SIP, IAX2, ZAP, or Custom (protocol other than the first three). With any of these protocol selected, click submit.
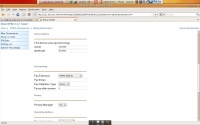
Then Dialog properties as shown in The Figure will appear, prompting you to enter all the information required for adding extension.
Fill in user extension with extension number, e.g. 1001. This is usually just numeric. Then fill in the display name, the name that will be used as Caller ID when dialing. Fill in secret with the password used by user for authentication process in registration extension at User Agent layer. Click Submit.


