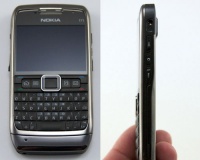
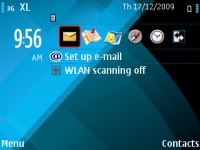
Difference between revisions of "VoIP: Konfigurasi Nokia E71 untuk opensips dan asterisk"
Onnowpurbo (talk | contribs) |
Onnowpurbo (talk | contribs) |
||
| (10 intermediate revisions by the same user not shown) | |||
| Line 7: | Line 7: | ||
* Register / Daftar ke [[Softswitch]] | * Register / Daftar ke [[Softswitch]] | ||
| − | ==Detail Konfigurasi Nokia== | + | =='''Prinsip Konfigurasi Nokia E71'''== |
| + | |||
| + | Menu -> Tools -> Settings -> SIP Settings -> Options -> Add new -> use default profile. | ||
| + | |||
| + | Profile name : nama profile | ||
| + | Service profile : IETF | ||
| + | Default access point : [[Access Point]] | ||
| + | Public Username : nomor@[[SIP Server]] | ||
| + | Use compression : No | ||
| + | Registration : When needed | ||
| + | Security : No | ||
| + | |||
| + | Proxy Server | ||
| + | |||
| + | Proxy Server : [[SIP Server]] | ||
| + | Realm : asterisk | ||
| + | Username : nomor [[VoIP]] | ||
| + | Password : password [[VoIP]] | ||
| + | |||
| + | Registrar Server | ||
| + | |||
| + | Registrar Server : [[SIP Server]] | ||
| + | Realm : asterisk | ||
| + | Username : nomor [[VoIP]] | ||
| + | Password : password [[VoIP]] | ||
| + | |||
| + | ==Detail Konfigurasi SIP Settings pada Nokia== | ||
Tekan tombol Menu -> Tools -> Settings -> SIP Settings -> Options -> Add new -> use default profile. | Tekan tombol Menu -> Tools -> Settings -> SIP Settings -> Options -> Add new -> use default profile. | ||
| Line 20: | Line 46: | ||
Edit profile pastikan agar: | Edit profile pastikan agar: | ||
| − | + | Profile name : nama profile yang anda sukai | |
| − | + | Service profile : IETF | |
| − | + | Default access point : nama akses point untuk tersambung ke jaringan | |
| − | + | Public Username : gunakan format username@namaserver, seperti 2000@192.168.0.3 | |
| − | + | Use compression : No | |
| − | + | Registration : When needed | |
| − | + | Security : No | |
[[Image:Opensips0059.jpg|center|200px|thumb]] | [[Image:Opensips0059.jpg|center|200px|thumb]] | ||
[[Image:Opensips0062.jpg|center|200px|thumb]] | [[Image:Opensips0062.jpg|center|200px|thumb]] | ||
| − | Edit Registrar Server | + | Edit Proxy Server dan Registrar Server. Pastikan bahwa |
| + | |||
| + | Proxy Server : Domain atau [[IP address]] [[Softswitch]] | ||
| + | Registrar Server : Domain atau [[IP address]] [[Softswitch]] | ||
| + | Realm : asterisk (default dari asterisk) | ||
| + | Username : username anda | ||
| + | Password : password anda | ||
| + | |||
| + | [[Image:Opensips0064.jpg|center|200px|thumb]] | ||
| + | [[Image:Opensips0069.jpg|center|200px|thumb]] | ||
| + | |||
| + | Nanti pada menu [[SIP]] Settings akan tampil profile yang baru kita konfigurasi | ||
| + | |||
| + | [[Image:Opensips0080.jpg|center|200px|thumb]] | ||
| + | |||
| + | |||
| + | ==Detail Konfigurasi Internet Telepon di Nokia== | ||
| + | |||
| + | Tekan tombol Menu -> Tools -> Settings -> Internet Tel. -> Options -> New profile. | ||
| + | |||
| + | [[Image:Opensips0081.jpg|center|200px|thumb]] | ||
| + | [[Image:Opensips0082.jpg|center|200px|thumb]] | ||
| + | [[Image:Screenshot0033.jpg|center|200px|thumb]] | ||
| + | |||
| + | Isi supaya | ||
| + | |||
| + | Name : nama profile yang kita inginkan | ||
| + | SIP profiles : SIP profile yang ada | ||
| + | |||
| + | [[Image:Opensips0086.jpg|center|200px|thumb]] | ||
| + | |||
| + | ==Detail register ke Softswitch== | ||
| + | |||
| + | Untuk register ke softswitch tekan tombol Menu -> Commucation -> Net.Tel. -> nama profile. | ||
| + | |||
| + | [[Image:Opensips0088.jpg|center|200px|thumb]] | ||
| + | [[Image:Opensips0089.jpg|center|200px|thumb]] | ||
| + | |||
| + | Pastikan akses ke port 5060-6060 dan 8000 s/d 20000 terbuka. Akses ke port ini kadang kala di tutup oleh [[Firewall]]. Bagi anda yang menggunakan [[NAT]] saja biasanya cukup aman. | ||
| + | |||
| + | [[Image:Opensips0090.jpg|center|200px|thumb]] | ||
| + | [[Image:Opensips0091.jpg|center|200px|thumb]] | ||
| + | |||
| + | Register berhasil dengan baik jika ada message "Conneted ..." | ||
| + | [[Image:Opensips0092.jpg|center|200px|thumb]] | ||
==Pranala Menarik== | ==Pranala Menarik== | ||
| + | * [[VoIP: Hardware Client VoIP]] | ||
| + | * [[VoIP: Software dan peralatan client Internet Telepon]] | ||
* [[VoIP]] | * [[VoIP]] | ||
Latest revision as of 19:07, 28 December 2009
Logika berfikir konfigurasi Nokia untuk dapat menelepon melalui VoIP
- Konfigurasi Account SIP untuk VoIP
- Konfigurasi Internet Telepon menggunakan account SIP yang mana
- Register / Daftar ke Softswitch
Prinsip Konfigurasi Nokia E71
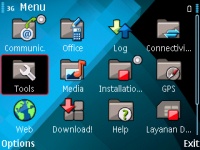
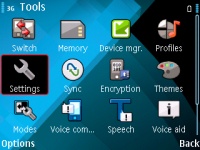
Menu -> Tools -> Settings -> SIP Settings -> Options -> Add new -> use default profile.
Profile name         : nama profile
Service profile      : IETF
Default access point : Access Point
Public Username      : nomor@SIP Server
Use compression      : No
Registration         : When needed
Security             : No
Proxy Server
Proxy Server         : SIP Server
Realm                : asterisk
Username             : nomor VoIP
Password             : password VoIP
Registrar Server
Registrar Server     : SIP Server
Realm                : asterisk
Username             : nomor VoIP
Password             : password VoIP
Detail Konfigurasi SIP Settings pada Nokia
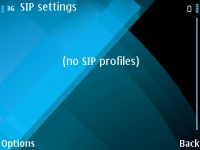
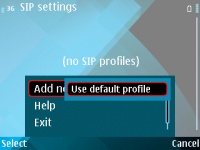
Tekan tombol Menu -> Tools -> Settings -> SIP Settings -> Options -> Add new -> use default profile.
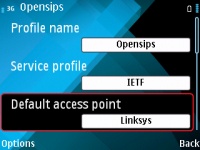
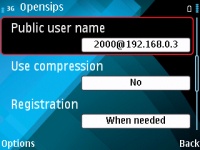
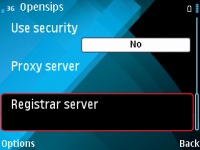
Edit profile pastikan agar:
Profile name         : nama profile yang anda sukai
Service profile      : IETF
Default access point : nama akses point untuk tersambung ke jaringan
Public Username      : gunakan format username@namaserver, seperti 2000@192.168.0.3
Use compression      : No
Registration         : When needed
Security             : No
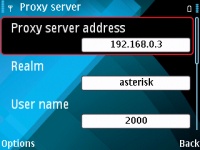
Edit Proxy Server dan Registrar Server. Pastikan bahwa
Proxy Server         : Domain atau IP address Softswitch
Registrar Server     : Domain atau IP address Softswitch
Realm                : asterisk (default dari asterisk)
Username             : username anda
Password             : password anda
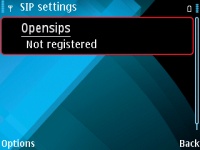
Nanti pada menu SIP Settings akan tampil profile yang baru kita konfigurasi
Detail Konfigurasi Internet Telepon di Nokia
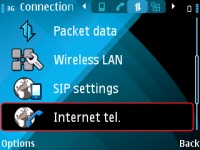
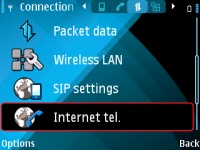
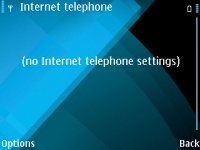
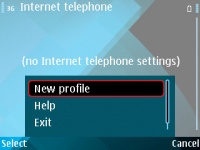
Tekan tombol Menu -> Tools -> Settings -> Internet Tel. -> Options -> New profile.
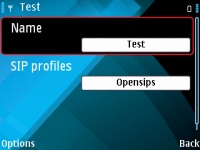
Isi supaya
Name              : nama profile yang kita inginkan
SIP profiles      : SIP profile yang ada
Detail register ke Softswitch
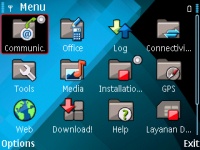
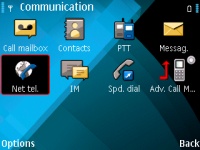
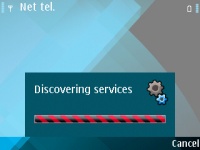
Untuk register ke softswitch tekan tombol Menu -> Commucation -> Net.Tel. -> nama profile.
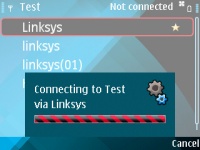
Pastikan akses ke port 5060-6060 dan 8000 s/d 20000 terbuka. Akses ke port ini kadang kala di tutup oleh Firewall. Bagi anda yang menggunakan NAT saja biasanya cukup aman.
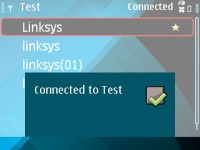
Register berhasil dengan baik jika ada message "Conneted ..."
